The setup
I have now made the whole thing except a few unnecessary but useful add ons like osd. Here is my whole setup for the tricopter.
Frame/FC: rcexplorer tricopter v3.5 (integrated naze32 and pdb) (tricopter v4 link)
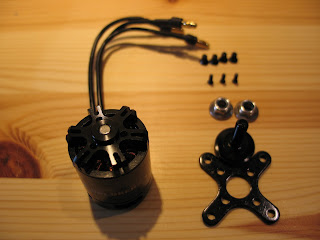
Motors/ESC's/servo/props: rcexplorer tricopter electronics kit
Battery: Zippy 4000mah 4s1p 20c (I'm hopefully going to get a better battery later)
Transmitter: FrSky taranis x9d plus
Receiver: FrSky x8r receiver (I'm going to get the x4r-sb)
FPV camera: foxeer hs1177 fpv camera
Video transmitter: immersionrc 25mw raceband vtx
Video Receiver: fatshark 32ch vrx
FPV goggles: fatshark dominator hd2
FPV antennas: Immersionrc 5.8gHz spironet rhcp antennas
Later I am also going to get a refurbished gopro hero 4 black hopefully and maybe a gimbal if I can afford it because I know even a cheap gimbal sub £50 will be better than no gimbal at all.
Also I want to get the x4r-sb as it is obviously lighter and since I am using sbus I have no need for 8 pwm channels but i got the x8r as it came with the transmitter and it was the only one in stock.
Another thing I want to upgrade is my receiving antenna for the vrx, I'm probably going to get the immersionrc mini patch antenna which only has a 45 degree beam width but and distance will be very good and maybe buy another receiver and make it diversity.
Finally I will hopefully get the micro minimosd with kv team mod and all sorts of telemetry but that will come later.
The build
The build was quite easy, only annoying thing was a solder pad come off (due to my soldering) so I soldered the wire to the next pad and it works perfectly. Only other problem was that 2 of the resistors were switched because a certain batch of FC's so I switched them which was annoying as they were smd resistors (explained here).
I also got telemetry on my transmitter working by using soft serial ports instead of the UART ports with which I'm already using both. the naze32 is also receiving the rssi value and of course vbat.
for now I am using 2 Overlander 2s 3200mah batteries from 2010 in series which work very well but i've already ordered the zippy's.
its not the cleanest build in the world but it works,and to prove that the next section is about its flights
The Flights
 The first flight I did was with my orange tx/rx as I didn't have the FrSky equipment at the time. I hovered a bit and just cruised LOS. It flew well and that made me very very happy after putting hours of work into it (I expected it to explode into a fireball or something). I have some video footage on board and from outside but the on board camera was this really old thing which wasn't very good, especially as I had to mount it sideways then flip it which made the video really narrow.
I was mainly flying line of sight but when I got my FPV gear I tried some FPV. since it was my first time it took a while to get used to it but after a while I was getting the hang of it but I still couldn't do any aerobatics :(.
On one attempt at flying the grass was too high (I need bigger landing gear) so my dad held it up. in that attempt I guess I was flying near a wasps nest as they started coming out and attacking it!


